Once you’ve fastened off the last stitch of all your garment pieces, it’s time to assemble them into something you can wear. There are a few ways to join crochet pieces together and each version serves a different purpose. Some use a yarn needle and are woven or sewn together and some use a crochet hook and are crocheted together. In all instances you will use the same yarn that was used for your project. For the most part you want to join edges together neatly without creating bulky seams. However, sometimes you need a very sturdy seam for a garment that will get a lot of wear, so a little bulk is a small price to pay for longevity.
woven seam
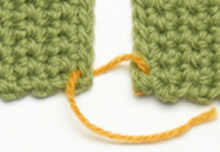
1. This method gives you an invisible seam with no bulk. Work on a flat surface. With the right sides of both pieces facing you, and the two edges adjoined, secure with safety pins every 2″/5cm. Thread a yarn needle with the tail from the foundation chain. To secure the edges together before weaving, insert the needle from back to front into the corner stitch of the piece without the tail. Making a figure eight with the yarn, insert the needle, from back to front, into the stitch with the tail. Tighten to close up the gap.
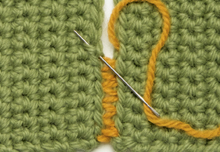
2. To begin weaving the seam, insert the needle through the first stitch on the left edge and then through the first stitch on the right edge. Insert the needle through the next stitch on the left edge and then through the next stitch on the right edge. Continue to alternate weaving from edge to edge in this manner, carefully matching stitches (or rows) and drawing the yarn only tight enough the keep the edges together.
backstitch seam
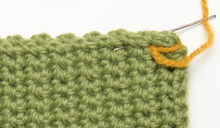
1. The backstitch is used when you need a seam that’s extra strong and bulk is not an issue. Place the pieces together so the right sides are facing, then pin every 2″/5cm. Thread the tail from the foundation chain into the yarn needle. Working from back to front, secure the beginning of the seam by taking the needle twice around the bottom edges. Working from back to front again, insert the needle so it exits about ¼”/.5cm from the last stitch, as shown.
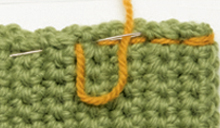
2. Insert the needle into the same hole as the last stitch, then back up approximately ¼”/.5cm in front of the last stitch. Draw the yarn through, then tighten only enough to keep the edges together. Continue to work in this manner, taking care to keep the stitches straight and the same length.
whipstitch seam
single crochet seam
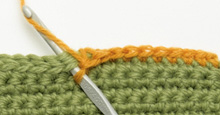
1. Use this method for decorative exterior seams. Working from the ball of yarn, make a slip knot 6″/15cm from the yarn end. Place the slip knot on the hook. To work across top edges, place the pieces together so wrong sides are facing. Working from front to back, insert the crochet hook through both loops of each piece and draw through a loop. Yarn over and draw through both loops on the hook. Continue to work one single crochet in each pair of adjacent loops across.
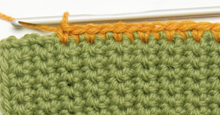
2. To work across side edges, place the pieces together so wrong sides are facing. Working through both thicknesses, work single crochet stitches directly into matching stitches at the side edge, making sure to space them evenly and at the same depth so that all single crochet stitches are the same size.