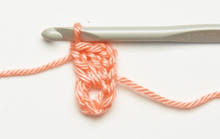
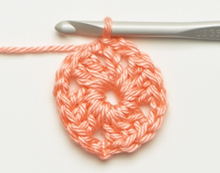
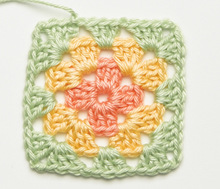
a sl st forming a ring. For round 1, ch 3 (counts as 1 dc) working in the ring, work two more dc for the first 3-dc group as shown, then ch 2 for the first corner ch-2 sp. 2. To complete the round, [work 3 dc in ring, ch 2] 3 times. (Note: As you crochet around, work the dc groups over the tail of the ring or tail from the previous round. This way you won’t have to weave them in later.) This gives you three more 3-dc groups and three more corner ch-2 sps. Join the rnd with a sl st in the top of the beg ch-3 (the first “dc”). Fasten off.