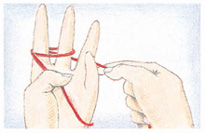
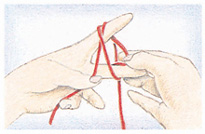
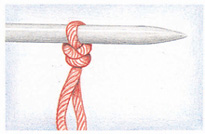
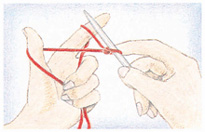
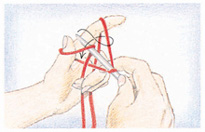
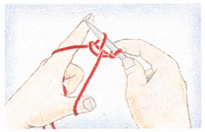
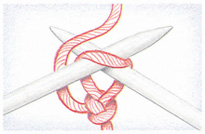
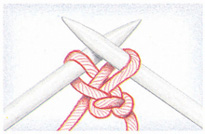
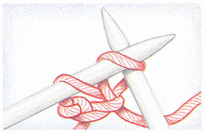
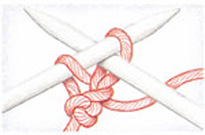
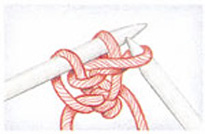
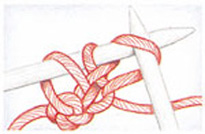
60 NEW PATTERNS AVAILABLE NOW!

First Stitches

SLIP KNOT

This is the stitch to start all stitches, the one that anchors the yarn to the needles and makes it possible to cast on. Before starting the slip knot, decide which method of casting on you want to try. If you choose the long-tail cast-on method, leave approximately an inch for every stitch that you’re about to place on the needle. For the knitted cast-on, leave eight to ten inches between the end of the yarn and the slip knot.

Slip Knot

Slip Knot

1. Hold the short end of the yarn in your palm with your thumb. Wrap the yarn twice around the index and middle fingers.

Slip Knot

2. Pull the strand attached to the ball through the loop between your two fingers, forming a new loop.

Slip Knot

3. Place the new loop on the needle. Tighten the loop on the needle by pulling on both ends of the yarn to form the slip knot. You are now ready to begin one of the following cast-on methods.

CASTING ON

Although there are numerous ways to get those first stitches on the needle, we have chosen two of the most basic versions to get you started. The first technique, a long-tail cast-on, uses one needle and two lengths of yarn, while the knitted variation uses two needles and one strand of yarn. A firm cast-on row makes for a good project to come. Practice casting on with your favorite technique until it feels like second nature and the stitches appear uniform in size and spacing.

Long-Tail Cast-On

The long-tail cast-on method provides a firm yet elastic edge and is frequently recommended for beginners.

Long-Tail Cast-On

1. Make a slip knot on the right needle, leaving a long tail. Wind the tail end around your left thumb, front to back. Wrap the yarn from the ball over your left index finger and secure the ends in your palm.

Long-Tail Cast-On

2. Insert the needle upward in the loop on your thumb. Then with the needle, draw the yarn from the ball through the loop to form a stitch.

Long-Tail Cast-On

3. Take your thumb out of the loop and tighten the loop on the needle. Continue in this way until all the stitches are cast on.

Knitted Cast-On

For the knitted cast-on, use two needles and one length of yarn.

Knitted Cast-On

1. Make a slip knot on the left needle. *Insert the right needle knitwise into the stitch on the left needle. Wrap the yarn around the right needle as if to knit.

Knitted Cast-On

2. Draw the yarn through the first stitch to make a new stitch, but do not drop the stitch from the left needle.

Knitted Cast-On

3. Slip the new stitch to the left needle as shown. Repeat from the * until the required number of stitches is cast on.

Cable Cast-On

The cable cast-on forms a sturdy yet elastic edge. It is perfect for ribbed edges.

Cable Cast-On

1. Cast on two stitches using the knitted cast-on described above. *Insert the right needle between the two stitches on the left needle.

Cable Cast-On

2. Wrap the yarn around the right needle as if to knit and pull the yarn through to make a new stitch.

Cable Cast-On

3. Place the new stitch on the left needle as shown. Repeat from the *, always inserting the right needle in between the last two stitches on the left needle.

Tip: When you first learn to cast on, your foundation row may be so tight that it’s difficult to get your needle into the little loops. If that happens, try casting on with two needles held together or with a needle two sizes larger than you’ll be using for the rest of the project. If, on the other hand, you find yourself with a beginning edge that looks like it was made with a toilet paper roll, try casting on to a needle two sizes smaller.